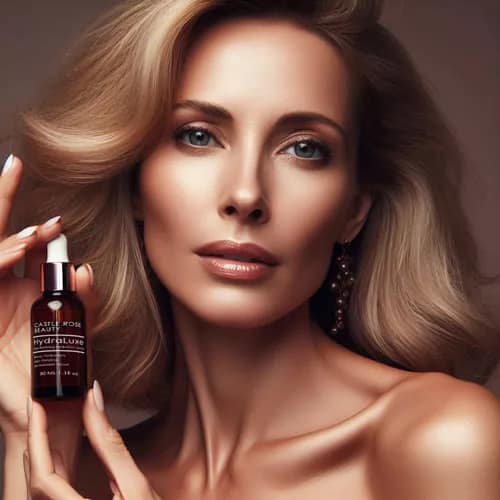
If you’ve ever wondered how to make your own DIY Hyaluronic Acid Serum, you’re in the right place!
Hey there, beautiful souls! Have you ever stood in the skincare aisle, staring at rows of hyaluronic acid serums, and thought, “Hmm, could I make this myself?” Well, I’ve been there too, and guess what? You absolutely can, and it’s easier than you think!
Hyaluronic acid is like a magic potion for your skin. It hydrates, plumps, and can make you look as if you’ve just stepped out of a spa. But let’s be real, those tiny bottles at the store can cost a pretty penny. So, why not make your own? It’s a win-win; you save money and get to play skincare scientist for a day.
Table of Contents
What is Hyaluronic Acid?
Ah, hyaluronic acid, the darling of the skincare world! But what exactly is it? Is it an acid that burns, or is it something else? Spoiler alert: it’s not the kind of acid you might be thinking of.
Hyaluronic acid is a sugar molecule that naturally occurs in our bodies. Yep, you heard that right! It’s found in our skin, eyes, and even joints. Its superpower? Holding up to 1,000 times its weight in water. Imagine a tiny sponge soaking up all that moisture; that’s hyaluronic acid for you!
So why is it a big deal in skincare? Well, hyaluronic acid is like a tall glass of water for your skin. It helps to keep your skin hydrated and plump, making it look youthful and radiant. And let’s face it, who doesn’t want that?
But here’s the kicker: as we age, our natural production of hyaluronic acid decreases. Yep, another thing to add to the list of “Why Aging Can Be a Drag.” But don’t worry, that’s where our DIY Hyaluronic Acid Serum comes into play!
So now that you’re in the know about what hyaluronic acid is and why it’s a skincare superstar, are you excited to make your own serum? I know I am!
Why Make Your Own Serum?
So, you might be wondering, “Why should I make my own serum when I can just buy one?” Ah, great question! And I’ve got some compelling reasons that might just make you a DIY convert.
Cost-Effectiveness
First off, let’s talk money. Those high-end serums can cost an arm and a leg. Making your own serum can be a real money-saver. You buy the ingredients once and can make multiple batches. More serum, less spending—sounds like a deal, right?
Control Over Ingredients
Next up, control. When you make your own serum, you know exactly what’s going into it. No hidden chemicals or preservatives that you can’t even pronounce. You get to pick the best, most natural ingredients. Your skin will thank you!
Freshness
Last but not least, let’s talk about freshness. Store-bought serums can sit on shelves for who knows how long. But your DIY serum? Fresh as a daisy! You can make small batches and use them while they’re at their most potent.
So, are you convinced yet? Making your own hyaluronic acid serum is like cooking your favorite meal. It’s rewarding and cost-effective, and you know exactly what you’re getting. Plus, it’s a fun little project that you can even do with friends or family!
Ingredients You’ll Need
Alright, let’s get down to the nitty-gritty—the ingredients! Making your own DIY Hyaluronic Acid Serum is like baking a cake; you need the right ingredients to make it perfect. So, what will you need to whip up this skin-loving potion?
Hyaluronic Acid Powder
The star of the show! This is what gives your serum its hydrating superpowers. Just a little goes a long way!
Distilled Water
You’ll need this to dissolve the hyaluronic acid powder. Make sure it’s distilled to ensure there are no impurities.
Glycerin
This is optional but highly recommended. Glycerin adds an extra layer of moisture and helps the serum feel silky smooth on your skin.
Preservative

We want our serum to last, right? A preservative like Leucidal Liquid or Optiphen will help extend its shelf life.
Essential Oils (Optional)
Want to add a lovely scent or some additional skin benefits? A few drops of lavender or rose essential oil can make your serum smell divine.
Benefits of Each Ingredient
- Hyaluronic Acid: Super hydrating and plumping.
- Distilled Water: The purest form of water for a clean serum.
- Glycerin: Adds moisture and makes your skin feel soft.
- Preservative: Keeps your serum fresh for longer.
- Essential Oils: Adds scent and potential skin benefits.
Here, the ingredients you’ll need to make your own DIY Hyaluronic Acid Serum. Not too complicated, right? And the best part is, once you have these ingredients, you can make multiple batches!
Step-by-Step Guide to Making DIY Hyaluronic Acid Serum
Okay, friends, it’s time to roll up those sleeves and get a little crafty! Making your own DIY Hyaluronic Acid Serum is like a mini science experiment, but don’t worry, it’s a simple one. Here’s how to do it:
Step 1: Gather Your Supplies
Before you start, make sure you have all your ingredients and tools ready. You’ll need:
- A small mixing bowl
- A whisk or spoon
- A dropper bottle
- Measuring spoons
Step 2: Sterilize Everything
We want our serum to be as clean as possible. So, sterilize your mixing bowl, whisk, and dropper bottle with some boiling water or alcohol.
Step 3: Mix Water and Hyaluronic Acid
Take your small mixing bowl and add 1 cup of distilled water. Slowly sprinkle in 1 teaspoon of hyaluronic acid powder while stirring. The mixture will start to get cloudy—that’s a good sign!
Step 4: Add Glycerin
If you’re using glycerin, now’s the time to add it. Put in about 1 tablespoon and give it a good stir.
Step 5: Add Preservative
To make sure your serum stays fresh, add a few drops of your chosen preservative and mix well.
Step 6: Optional – Add Essential Oils
If you’re using essential oils, add 2-3 drops now. Stir until everything is well combined.
Step 7: Transfer to Dropper Bottle
Once your serum is all mixed up, use a funnel to transfer it into your sterilized dropper bottle.
Step 8: Shake and Let Sit
Close the dropper bottle and give it a good shake. Let it sit for a few hours or overnight to allow the hyaluronic acid to fully dissolve.
Precautions to Take
- Always do a patch test before using your DIY serum.
- Make sure to store it in a cool, dark place.
Shelf Life
Your DIY serum should last about 2-3 weeks if stored properly. If you’ve used a preservative, it could last up to a month or more. Watch for any changes in color, smell, or texture. If something seems off, it’s better to be safe and make a fresh batch.
Tips for Longer Shelf Life
- Consider storing it in the fridge. The cool temperature can extend its life a bit longer.
- Use dark-colored dropper bottles. They can help protect the serum from light.

How to Use Your DIY Serum
Yay, you’ve made it! You’ve got your DIY Hyaluronic Acid Serum all bottled up and ready to go. But hold on a sec, let’s make sure you know how to use it to get the most bang for your buck.
When to Apply
The best time to apply your serum is right after cleansing and toning, but before moisturizing. Your skin is like a sponge, and we want it to soak up all this hydrating goodness.
How Much to Use
A little goes a long way! Seriously, you don’t need much. Just 2-3 drops should be enough to cover your entire face. If you want to include your neck and décolletage, feel free to use a bit more.
Tips for Best Results
- Pat, Don’t Rub: Gently pat the serum on your skin rather than rubbing it. This helps with absorption.
- Layering: If you’re using other serums or treatments, make sure to layer them correctly. Water-based serums like this one should go on before oil-based products.
- Morning or Night: You can use this serum both in the morning and at night. If you’re using it in the morning, don’t forget to follow up with sunscreen!
Are you ready to give your skin the love it deserves? Trust me, once you start using your DIY Hyaluronic Acid Serum, you’ll wonder how you ever lived without it!
Your Skincare Creation Awaits!
Wow, learning the ins and outs of hyaluronic acid to actually making your own serum, you’ve become a true DIY skincare aficionado!
By now, you should have a dropper bottle filled with your very own DIY Hyaluronic Acid Serum. It’s not just a bottle; it’s a symbol of your creativity, your commitment to skincare, and let’s not forget, some savvy cost-saving!
So, what’s next? Well, the world—or at least your bathroom counter—is your oyster. You’ve got the knowledge and the tools to keep your skin hydrated and happy. And who knows? Maybe this is just the beginning of your DIY skincare adventures.
Remember, skincare is not just a routine; it’s a form of self-love. And you, my friend, have just taken it to a whole new level.
FAQ‘s
I bet you’ve got some questions bubbling up after reading this post. No worries, I’ve got you covered. Here are some frequently asked questions about DIY Hyaluronic Acid Serum and their answers.
What ingredients should be in hyaluronic acid serum?
The basic ingredients for a DIY hyaluronic acid serum are:
Hyaluronic Acid Powder
Distilled Water
Optional: Glycerin, Preservative, and Essential Oils
These ingredients work together to create a hydrating and effective serum.
What hydrates skin better than hyaluronic acid?
While hyaluronic acid is a superstar hydrator, other ingredients like glycerin, squalane, and ceramides can also offer excellent hydration. Each has its unique benefits, so you should experiment to see what works best for your skin.
How can I hydrate my face without hyaluronic acid?
If hyaluronic acid isn’t your thing, you can opt for serums or moisturizers that contain other hydrating ingredients like glycerin, aloe vera or rose water. Natural oils like jojoba or argan oil can also provide good hydration.
How do you make the best hyaluronic acid serum?
The key to making the best hyaluronic acid serum is quality ingredients and precise measurements. Always use distilled water and high-quality hyaluronic acid powder. Optional additives like glycerin or essential oils can enhance the serum’s texture and benefits.
What is a natural alternative to hyaluronic acid?
If you’re looking for a natural alternative, aloe vera gel is a good option. It’s hydrating and has a similar gel-like texture. Other natural alternatives include honey and vegetable glycerin.


